How do solar traffic sign integrate with existing road markings and signage systems?

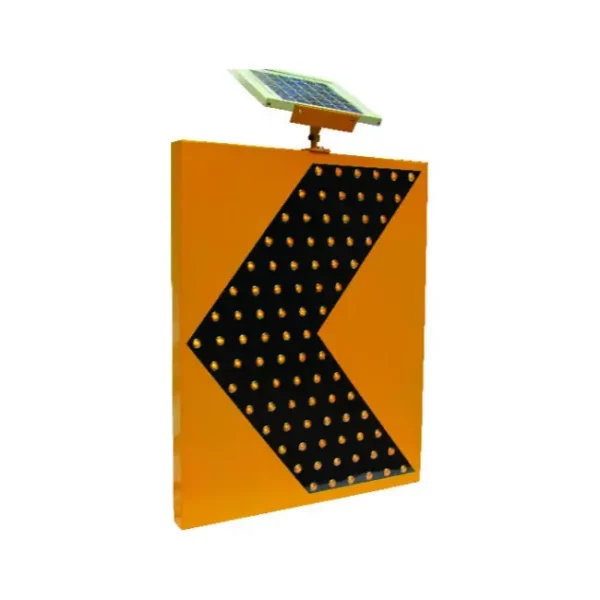
The integration of solar traffic signs with existing road markings and signage systems is essential to ensure a cohesive and effective traffic management infrastructure.

Here are ways in which solar traffic signs can be integrated seamlessly with existing road markings and signage systems:

  1. Strategic Placement:
    • Solar traffic signs should be strategically placed to complement existing road markings and signs.
    • Consideration of visibility, sight lines, and the overall flow of traffic is crucial to ensure that the solar signs enhance rather than obstruct the effectiveness of the entire system.
  2. Consistent Messaging:
    • The messaging on solar traffic signs should align with the information conveyed by adjacent road markings and signs.
    • Consistency in messaging helps drivers easily interpret and respond to traffic regulations, warnings, or guidance provided by both static and solar-powered elements.
  3. Color Coordination:
    • Ensure that the colors used in solar traffic signs are coordinated with the color scheme of standard road markings and signs.
    • Consistent color usage contributes to a standardized and recognizable visual language for drivers.
  4. Reflectivity and Visibility:
    • Solar traffic signs, like traditional signs, solar traffic sign should maintain high reflectivity to enhance visibility, especially during low-light conditions.
    • The reflective elements on signs should align with reflective materials used in road markings for uniform visibility.
  5. Compliance with Standards:
    • Solar traffic signs should comply with relevant traffic sign standards and regulations.
    • Meeting established standards ensures that the signs integrate seamlessly with the overall traffic control system and are universally understood.
  6. Smart Signage Systems:
    • Implement smart signage systems that allow for communication and coordination between solar traffic signs and other elements of the traffic management infrastructure.
    • Smart systems enable real-time updates, adjustments, and synchronization with changing traffic conditions.
  7. Integration with Road Markings:
    • Consider integrating solar traffic signs with road markings to create a unified visual presentation.
    • For example, solar signs indicating pedestrian crossings can be placed in conjunction with painted crosswalk markings.
  8. Adjustable Mounting Heights:
    • Design solar traffic sign installations with adjustable mounting heights to ensure alignment with standard sign heights.
    • Consistent placement and visibility contribute to the overall harmony of the traffic signage system.
  9. Modular Systems:
    • Implement modular solar sign systems that can be easily expanded or adapted to changing traffic conditions.
    • Modular designs facilitate integration with existing signage systems without major infrastructure changes.
  10. Complementary Illumination:
    • Coordinate the illumination of solar traffic signs with other lighting elements on the road, such as streetlights.
    • Complementary illumination ensures that the signs remain visible and legible, even in low-light conditions.
  11. Regular Maintenance:
    • Implement a maintenance plan to ensure the ongoing visibility and functionality of solar traffic signs.
    • Regular cleaning, inspection, and repair contribute to the overall effectiveness of the integrated signage system.
  12. Community Engagement:
    • Engage with the community and stakeholders to ensure awareness and acceptance of solar traffic signs.
    • Community input can provide valuable insights into the integration process and address specific local considerations.

By carefully considering these factors, solar traffic signs can be seamlessly integrated into existing road markings and signage systems, enhancing the overall effectiveness of traffic control measures and contributing to a safer and more efficient transportation infrastructure.

How are potential issues related to light exposure and UV protection addressed in coffee bags with valve design?

Potential issues related to light exposure and UV protection in coffee bags with valve design are addressed through specific packaging strategies aimed at preserving the freshness and quality of the coffee beans. Exposure to light, particularly UV light, can lead to the degradation of coffee compounds and affect the overall flavor and aroma.

Here are measures commonly taken to mitigate these issues:

  1. Opaque Packaging Material:
    • Coffee bags with valve design often use opaque or dark-colored packaging materials, such as foil or multilayer laminates. These materials provide a barrier against light, preventing UV rays from reaching the coffee beans and minimizing the risk of degradation.
  2. Aluminum Foil Layers:
    • Incorporating aluminum foil layers into the bag construction enhances light barrier properties. Aluminum foil acts as an effective barrier against both light and oxygen, helping to preserve the freshness of the coffee beans and protect them from UV radiation.
  3. UV-Blocking Additives:
    • Some packaging materials are formulated with UV-blocking additives. These additives help absorb or reflect UV radiation, providing an additional layer of protection against light-induced degradation. Manufacturers may choose materials with UV inhibitors to enhance UV protection.
  4. Dark Exterior Printing:
    • Printing designs and labels on the exterior of the coffee bag can be done using dark colors to minimize light penetration. This helps maintain the opacity of the packaging and ensures that the entire bag contributes to light protection.
  5. Inner Foil Liners:
    • In addition to the outer layers, coffee bags may feature inner foil liners. These liners provide an extra barrier against light and help maintain a controlled environment for the coffee beans. The valve design allows for the release of gases without compromising the protective qualities of the packaging.
  6. UV-Resistant Inks:
    • When printing information, branding, or designs on the coffee bag, manufacturers can use UV-resistant inks. coffee bags with valve These inks are less susceptible to fading or degrading when exposed to UV light, ensuring that the packaging remains aesthetically appealing and functional.
  7. Storage Recommendations:
    • Manufacturers often provide storage recommendations on the packaging to guide consumers in preserving coffee freshness. Recommendations may include storing the coffee in a cool, dark place away from direct sunlight to minimize light exposure.
  8. Quality Valve Design:
    • The valve design in coffee bags serves the purpose of allowing the release of gases produced by freshly roasted coffee beans while preventing external air from entering. The valve itself is designed to be airtight and may include additional layers or coatings to enhance UV protection.
  9. Packaging Design Elements:
    • Consideration is given to the overall design of the packaging, including its structure and any additional features. Some coffee bags may include a matte finish or texture that helps diffuse light, reducing the impact of direct light exposure.
  10. Testing and Quality Assurance:
    • Manufacturers conduct testing to assess the effectiveness of the packaging in preventing light-induced degradation. This may involve exposure testing under simulated conditions to evaluate the performance of the packaging material over time.
  11. Transparent Window Considerations:
    • If a coffee bag includes a transparent window for product visibility, it may be treated with UV-resistant coatings or films to mitigate the potential negative effects of light exposure on the coffee beans inside.
  12. Educational Information:
    • Manufacturers may provide educational information on the packaging, informing consumers about the importance of protecting coffee from light and UV radiation. This information may encourage proper storage practices to maintain coffee quality.

By combining these strategies, coffee bag manufacturers can effectively address potential issues related to light exposure and UV protection, ensuring that the coffee beans inside remain fresh, flavorful, and aromatic for an extended period.

What measures are in place to ensure the safety of kraft stand up pouches materials in contact with pet food?

Ensuring the safety of kraft stand-up pouch materials in contact with pet food involves implementing various measures to meet regulatory standards, maintain product integrity, and safeguard the health of pets. Kraft materials are often used for their natural and eco-friendly characteristics, but it’s essential to address potential safety concerns, especially when they come into direct contact with pet food.

Here are measures commonly implemented to ensure the safety of kraft stand-up pouch materials in the context of pet food packaging:

  1. Compliance with Regulations:
    • Ensure that kraft materials used for pet food packaging comply with relevant regulations and standards for food contact materials. Regulatory agencies may have specific requirements related to the safety of materials that come into contact with food, including pet food.
  2. Material Testing and Certification:
    • Conduct thorough testing of the kraft materials to assess their safety for use in pet food packaging. This may involve testing for substances such as heavy metals, harmful chemicals, and contaminants. Seek certification from relevant authorities or organizations that validate the safety of the materials.
  3. Migration Testing:
    • Perform migration testing to assess whether any substances from the kraft material migrate into the pet food. This testing helps ensure that the packaging does not introduce harmful components that could compromise the safety of the pet food.
  4. Barrier Coatings or Laminations:
    • Apply appropriate barrier coatings or laminations to the kraft material to enhance its resistance to moisture, grease, and potential contaminants. This barrier helps maintain the quality and safety of the pet food by preventing external substances from affecting the contents.
  5. Adhesive Selection:
    • Choose adhesives that are safe for food contact and have been approved for use in pet food packaging. The adhesive used in bonding layers of the kraft material should not introduce harmful substances that could migrate into the pet food.
  6. Printing Inks and Dyes:
    • Select printing inks and dyes that are food-safe and compliant with relevant regulations. These materials should not pose a risk of contamination when they come into contact with the pet food. Water-based or food-grade inks are often preferred.
  7. Good Manufacturing Practices (GMP):
    • Adhere to Good Manufacturing Practices in the production of kraft stand-up pouches. GMP guidelines ensure that the manufacturing process is conducted in a hygienic and controlled environment, reducing the risk of contamination.
  8. Regular Facility Inspections:
    • Conduct regular inspections of manufacturing facilities to identify and address any potential sources of contamination. kraft stand up pouches This includes ensuring that equipment used in the production of kraft pouches is clean and well-maintained.
  9. Supplier Audits:
    • Perform audits of kraft material suppliers to assess their adherence to quality and safety standards. Verify that the raw materials supplied for pouch production meet the specified safety criteria.
  10. Traceability Systems:
    • Establish traceability systems that allow for the tracking of materials from the supplier to the finished product. This facilitates quick identification and removal of any potentially unsafe materials in the event of a safety concern or recall.
  11. Educating Employees:
    • Train employees on the importance of safety measures in the production of pet food packaging. This includes proper handling of materials, adherence to hygiene practices, and reporting procedures for any potential safety issues.
  12. Allergen Management:
    • Implement measures to prevent cross-contamination with allergens. If the kraft stand-up pouches are used for various pet food formulations, ensure that proper cleaning procedures are in place to avoid allergen transfer.
  13. Collaboration with Regulatory Authorities:
    • Stay informed about updates to regulations related to food contact materials. Collaborate with regulatory authorities to ensure ongoing compliance and to address any new safety considerations that may arise.

By implementing these measures, manufacturers can help ensure the safety of kraft stand-up pouch materials used in contact with pet food. It’s essential to maintain a holistic approach to quality and safety, incorporating testing, compliance, and best practices throughout the production process. Regular monitoring, audits, and continuous improvement efforts contribute to the overall safety and integrity of the pet food packaging.

How do fuel injectors function, and what issues may arise if they are not working properly?

Fuel injectors are essential components of a vehicle’s fuel system, responsible for delivering a precise amount of fuel into the engine’s combustion chambers.

Here’s an overview of how fuel injectors function and potential issues that may arise if they are not working properly:

Function of Fuel Injectors:

  1. Spraying Fuel:
    • Fuel injectors spray a fine mist of fuel directly into the combustion chambers of the engine. This spray is precisely timed to mix with air for efficient combustion.
  2. Electronic Control:
    • Modern fuel injectors are electronically controlled and are part of the engine management system. The Engine Control Unit (ECU) determines the optimal fuel injection timing and duration based on various engine parameters.
  3. Multiple Injections:
    • Some engines use multiple fuel injections during each combustion cycle to optimize fuel atomization and combustion efficiency.
  4. Adjustable Flow Rates:
    • Fuel injectors can vary the flow rate of fuel based on driving conditions, engine load, and other factors. This adaptability helps improve fuel efficiency and reduce emissions.

Common Issues with Fuel Injectors:

  1. Clogging:
    • Over time, fuel injectors can become clogged with deposits, dirt, or contaminants in the fuel. This can lead to poor fuel atomization, uneven combustion, and engine misfires.
  2. Leaking:
    • Injector seals or components may wear out, leading to fuel leaks. This can cause a drop in fuel pressure, affecting engine performance and fuel efficiency.
  3. Sticking:
    • Fuel injectors can stick in the open or closed position, affecting the fuel delivery. This can result in rough idling, poor acceleration, or excessive fuel consumption.
  4. Electrical Issues:
    • Problems with the injector’s electrical components, such as the solenoid or wiring, can disrupt the proper functioning of the injector. China auto parts manufacturers This may lead to irregular fuel delivery.
  5. Faulty Spray Pattern:
    • Injector nozzles may wear out, affecting the spray pattern of the fuel. An irregular spray pattern can impact combustion efficiency and emissions.
  6. Engine Misfires:
    • Malfunctioning fuel injectors can cause engine misfires, leading to a noticeable decrease in performance, rough idling, and increased exhaust emissions.
  7. Reduced Fuel Efficiency:
    • Inefficient fuel injectors can result in poor fuel atomization and incomplete combustion, leading to reduced fuel efficiency.
  8. Check Engine Light:
    • Issues with fuel injectors often trigger the vehicle’s onboard diagnostics system, causing the check engine light to illuminate. Diagnostic trouble codes (DTCs) related to fuel injection may be stored in the ECU.

Maintenance and Prevention:

To maintain proper fuel injector function and prevent issues:

  • Use quality fuel and follow regular fuel system maintenance practices.
  • Use fuel system cleaners periodically to reduce deposits.
  • Adhere to the recommended service intervals for fuel injector cleaning or replacement.
  • Address any engine performance issues promptly to prevent secondary damage.

If you suspect issues with your fuel injectors, it’s advisable to have the vehicle inspected by a qualified mechanic. Professional diagnostics and cleaning or replacement of fuel injectors may be necessary to restore optimal engine performance.

How do drivers troubleshoot and address common issues with auto parts, such as the starter motor?


Troubleshooting and addressing common issues with auto parts, such as the starter motor, involve a systematic approach to identify the root cause of the problem.

Here is a step-by-step guide on how drivers can troubleshoot and address starter motor issues:

  1. Check the Battery:
    • Inspect the battery to ensure it has sufficient charge. Weak or dead batteries are a common cause of starting problems. If the battery voltage is low, recharge or replace the battery as needed.
  2. Inspect Battery Terminals:
    • Check the battery terminals for corrosion or loose connections. Clean the terminals with a wire brush if necessary, and ensure tight connections.
  3. Test the Starter Solenoid:
    • The starter solenoid is responsible for engaging the starter motor. Test the solenoid by turning the ignition key to the “Start” position while listening for a clicking sound. If the solenoid clicks but the starter doesn’t engage, it may be faulty and require replacement.
  4. Tap the Starter Motor:
    • A common method for addressing a stuck starter motor is to tap it gently with a hammer or a solid object while someone attempts to start the vehicle. This can sometimes free up a stuck gear.
  5. Check for Voltage at the Starter:
    • Using a multimeter, check for voltage at the starter motor while attempting to start the vehicle. If there is voltage but the starter doesn’t turn, China auto parts supplier it may indicate a faulty starter motor that needs replacement.
  6. Inspect Wiring and Connections:
    • Examine the wiring leading to the starter motor for any signs of damage, corrosion, or loose connections. Repair or replace damaged wiring, and ensure secure connections.
  7. Test the Ignition Switch:
    • The ignition switch plays a crucial role in sending power to the starter motor. Test the ignition switch by checking for voltage at the starter when the key is turned to the “Start” position.
  8. Assess the Flywheel or Flexplate:
    • The starter engages with the flywheel or flexplate to turn the engine. Inspect these components for damage or missing teeth. If issues are found, it may be necessary to replace the damaged part.
  9. Perform a Voltage Drop Test:
    • Conduct a voltage drop test on the starter circuit to identify any high-resistance areas. Excessive voltage drops can affect starter performance.
  10. Consider Professional Diagnosis:
    • If troubleshooting steps do not reveal the issue, or if you are unsure about the diagnosis, consider seeking professional help from a mechanic or automotive technician.

Remember to follow safety precautions, such as disconnecting the battery, when working on the electrical components of a vehicle. If in doubt, it’s always advisable to consult with a qualified mechanic for a thorough diagnosis and proper resolution of starter motor issues.

How does the diaper packaging machine handle the attachment of elastic bands or leg cuffs to the diapers?

The attachment of elastic bands or leg cuffs to diapers is a crucial step in providing a secure and comfortable fit. Diaper packaging machines incorporate specific mechanisms and processes to handle this task efficiently:

  1. Feeding and Handling Systems: Automated systems handle the feeding and positioning of elastic bands or leg cuffs at designated stations within the packaging machine.
  2. Cutting and Shaping: The machine includes mechanisms to cut and shape the elastic bands or leg cuffs to the required dimensions, matching the size of the diapers being processed.
  3. Adhesive Application: Adhesive application stations apply specialized adhesives to the elastic bands or cuffs. These adhesives facilitate secure bonding to the diapers during the packaging process.
  4. Placement and Bonding: Precise positioning mechanisms ensure accurate placement of the elastic bands or leg cuffs onto the diapers. The machine then applies pressure or heat to bond the bands/cuffs securely to the diaper surface.
  5. Controlled Tension and Stretching: The machine controls the tension and stretching of the elastic bands or leg cuffs to ensure proper fit and elasticity without causing discomfort to the wearer.
  6. Alignment and Synchronization: Synchronization systems align the diapers and the elastic components correctly, ensuring uniform attachment across the production line.
  7. Quality Control Checks: Automated inspection systems verify the proper attachment of elastic bands or leg cuffs. They detect any irregularities or defects, allowing for immediate correction or rejection of faulty products.
  8. Packaging Integration: Once the elastic bands or leg cuffs are securely attached, the diapers proceed down the packaging line for further processing and packaging. Packaging materials are applied, diaper packaging machine suppliers ensuring that the elastic components remain securely attached during storage and transportation.
  9. Customization Options: Machines can be adjusted to accommodate different diaper sizes and styles, allowing for variations in the placement and attachment of elastic bands or leg cuffs based on specific product requirements.

By incorporating these specialized mechanisms and precise control systems, diaper packaging machines efficiently handle the attachment of elastic bands or leg cuffs, ensuring that the diapers meet quality standards and provide the necessary fit and comfort for users.

What are the key components responsible for controlling the size and dimensions of the diaper packaging machine ?

The size and dimensions of diaper packaging are controlled by several key components and mechanisms within the packaging machine:

  1. Adjustable Forming Plates or Molds: These plates or molds are customized components that shape the packaging material around the diapers. They can be adjusted to accommodate different diaper sizes and shapes.
  2. Cutting and Sealing Mechanisms: Machines include cutting systems that trim the packaging material to the required size and shape. Sealing mechanisms create the edges or seals of the packaging, ensuring the final dimensions match the specifications.
  3. Film Feeding and Pulling Systems: Automated systems control the feeding and pulling of packaging film. These systems ensure the correct length of film is used for each diaper package, contributing to the overall dimensions.
  4. Wrapping Stations: Machines have wrapping stations where the diapers are enclosed in the packaging material. These stations control the folding and wrapping of the material around the diapers, determining the final package dimensions.
  5. Adjustable Conveyors and Guides: Conveyor systems and guides assist in moving the diapers through the packaging process while maintaining proper alignment and positioning. These components help regulate the package size and prevent misalignment.
  6. Customizable Settings and Controls: The machine is equipped with control panels or interfaces that allow operators to input specific dimensions and parameters for packaging different diaper sizes. Operators can adjust settings for length, width, and height as needed.
  7. Sensors and Measurement Systems: Sensors monitor the dimensions of the packaging process, ensuring accuracy. These sensors detect any deviations from the specified dimensions, allowing for immediate adjustments.
  8. Forming and Folding Stations: Machines have forming and folding stations where the packaging material is shaped and folded around the diapers. These stations are adjusted to create packaging that matches the intended size and shape.
  9. Packaging Material Handling: The material used for packaging, such as plastic film or wrapping material, is handled by specific mechanisms that ensure consistent material tension and placement, contributing to uniform packaging dimensions.

By integrating these components and mechanisms, diaper packaging machines can be adjusted and controlled to produce packages of various sizes and dimensions, meeting specific requirements for different diaper products.

What measures are taken within the diaper manufacturing machine to ensure consistent and uniform product quality?

Consistent and uniform product quality in diaper manufacturing is crucial, and various measures are implemented within the machine to achieve this:

  1. Automated Processes: Automated systems handle many critical manufacturing steps, ensuring consistency in cutting, shaping, layering, and bonding of materials. This reduces variations caused by human error.
  2. Precision Control Systems: Machines utilize precise control systems to regulate parameters like material tension, temperature, pressure, and speed, ensuring uniformity throughout the manufacturing process.
  3. Quality Sensors and Inspection: Integrated sensors and inspection systems continuously monitor the production line, detecting irregularities, defects, or deviations from set standards. This allows for immediate corrective action to maintain uniform quality.
  4. Standardized Processes: Standard operating procedures and predefined settings for different diaper sizes and designs ensure that each product adheres to established quality standards consistently.
  5. Material Handling Techniques: Automated material handling systems maintain the integrity of raw materials, ensuring that each component used in the diapers meets specific quality criteria before being integrated into the production process.
  6. Real-time Monitoring and Feedback: Data collected during production is analyzed in real-time. Any deviations or anomalies are identified, and adjustments are made promptly to maintain uniform quality.
  7. Regular Maintenance and Calibration: Scheduled maintenance and calibration of machine components ensure that the equipment operates optimally, reducing the risk of variations due to mechanical issues.
  8. Quality Assurance Checks: Random samples are periodically tested in laboratories to validate the quality of finished diapers, confirming that they meet absorbency, strength, and safety standards.
  9. Training and Skill Development: Well-trained operators oversee the production process, ensuring that they understand quality standards, follow procedures meticulously, and identify and address any quality concerns during production.
  10. Continuous Improvement Initiatives: Regular assessments of processes, materials, and machinery are conducted to identify areas for improvement. Implementing changes based on these assessments enhances product consistency and quality.

By integrating these measures, diaper manufacturing machines maintain a high level of consistency and uniformity in product quality, ensuring that each diaper meets established standards for performance, safety, and comfort.

How does the adult diaper machine regulate the application of moisture-absorbing materials?

In the production of adult diapers, regulating the application of moisture-absorbing materials is crucial for ensuring the effectiveness of the product.

The machine manages this process in several ways:

  1. Material Feeding Systems: Automated systems control the feeding of moisture-absorbing materials, such as fluff pulp or superabsorbent polymers (SAPs), into the production line. These systems regulate the amount and distribution of these materials.
  2. Layering Mechanisms: The machine incorporates mechanisms for layering different materials. This includes layering the moisture-absorbing materials in specific areas within the diaper, such as the core, to optimize absorption.
  3. Precision Cutting and Shaping: Automated cutting systems ensure accurate cutting and shaping of the moisture-absorbing materials. diaper manufacturing machine This precision ensures uniformity and consistent coverage within the diaper structure.
  4. Distribution and Dispersion Techniques: The machine is designed to distribute and disperse the moisture-absorbing materials evenly across the designated areas within the diaper. This even distribution maximizes the absorption capacity.
  5. Controlled Application Methods: Various methods, such as air-assisted or conveyor-based systems, are employed to apply moisture-absorbing materials precisely. These methods control the deposition and spreading of materials to achieve the desired absorption characteristics.
  6. Adhesive and Bonding Processes: Adhesive application systems bond the layers of the diaper, including the moisture-absorbing materials, securely in place. This ensures that the materials stay properly positioned and functional during use.
  7. Quality Control and Monitoring: Automated sensors and inspection systems monitor the application of moisture-absorbing materials. They ensure uniformity, detect irregularities, and adjust application processes in real-time to maintain consistent absorption properties.
  8. Customization and Adjustability: The machine can be adjusted to accommodate variations in the amount or type of moisture-absorbing materials used. This flexibility allows for customization based on specific product requirements or user needs.

By incorporating these mechanisms and control systems, the adult diaper machine regulates the application of moisture-absorbing materials precisely, ensuring that the resulting products provide effective absorption and leakage protection for users.

The Essential Role of cross tee fittings in Plumbing Systems: Understanding its Functionality

Cross tee fittings play an essential role in plumbing systems by facilitating the distribution of water or fluids to multiple branches or fixtures. Understanding their functionality is crucial to designing and implementing efficient plumbing systems. Here’s an overview of the essential role and functionality of cross tee fittings:

Distribution of Water Flow:

Cross tee fittings are designed to provide a central point for the distribution of water flow in plumbing systems. They have four openings, forming a “cross” shape, where pipes can be connected at right angles. The main pipe (often called the “run”) is connected to one opening, while the remaining three openings serve as outlets for additional pipes (often called “branches”). This configuration allows water to flow from the main pipe into multiple branches, thereby distributing water to different fixtures or areas within a building.

Branch Line Connections:

Cross tee fittings enable the connection of branch lines to the main supply line. Branch lines are used to deliver water to specific fixtures, such as faucets, toilets, showers, or appliances. By connecting branch lines through cross tee fittings, the plumbing system can efficiently supply water to various points of use in a building without the need for separate supply lines for each fixture.

Equal Distribution of Water:

One crucial functionality of cross tee fittings is to ensure the equal distribution of water among the different branches. The design of cross tee fittings allows for balanced water flow, meaning that each branch receives an equal share of water pressure and flow. This equal distribution helps prevent imbalances in water pressure and ensures consistent water supply to all fixtures connected to the branches.

System Flexibility and Expansion:

Cross tee fittings provide flexibility and allow for system expansion. They offer connection points for additional branches, making it easier to accommodate future changes or additions to the plumbing system. If new fixtures or appliances need to be added, cross tee fittings can be used to extend the plumbing lines and connect them to the existing system without major modifications.

Simplified System Layout:

Cross tee fittings contribute to a simplified and organized plumbing system layout. They provide a central point for connecting multiple branches, making it easier to design and install the plumbing lines. The use of cross tee fittings helps streamline the piping configuration and minimizes complicated pipe arrangements, reducing the chances of errors and improving the overall efficiency of the system.

Maintenance and Repair Convenience:

Cross tee fittings offer convenience during maintenance and repairs. Their design allows for easy access and isolation of specific sections of the plumbing system. If a particular branch or fixture needs to be repaired or replaced, the cross tee fitting can be disconnected, allowing for the necessary work to be carried out without disrupting the entire water supply. This convenience saves time, effort, and minimizes disruptions to the building occupants.

In summary, cross tee fittings play an essential role in plumbing systems by facilitating the distribution of water flow to multiple branches or fixtures. Their functionality includes equal distribution of water, connection of branch lines, system flexibility, simplified system layout, and convenience during maintenance and repairs. By incorporating cross tee fittings effectively, plumbing professionals can ensure efficient water distribution and optimal performance of the plumbing system as a whole.

Where are metal key chains usually used?

Metal key chains find applications in various settings and industries due to their durability, versatility, and aesthetic appeal. Here are some common places and contexts where metal key chains are frequently used:

Personal Use:

  • Everyday Key Organization: Individuals use metal key chains to keep their keys organized and easily accessible for personal use, such as house keys, car keys, or office keys.
  • Personalization and Style: Key chains made of metal often serve as personal accessories, allowing individuals to express their style or interests through unique designs, shapes, or engravings.

Promotional and Marketing:

  • Branding and Marketing: Businesses often use metal key chains as promotional items or giveaways to promote their brand. These key chains can feature company logos, slogans, or contact information, serving as effective marketing tools.

Retail and Souvenirs:

  • Retail Merchandise: Retailers often sell metal key chains featuring popular designs, symbols, landmarks, or cultural references as souvenirs or collectibles for tourists or customers.

Events and Special Occasions:

  • Event Merchandise: Metal key chains are sometimes created as event souvenirs for conferences, weddings, parties, or special occasions, offering guests a memorable keepsake.

Access Control:

  • Security and Access: In institutional or commercial settings, metal key chains might be used for access control systems, holding keycards, or security passes for buildings, hotels, or gated communities.

Gifting and Recognition:

  • Gift Items: Metal key chains are commonly given as gifts due to their durability and customizable nature, making them suitable for birthdays, graduations, or other special milestones.

Safety and Identification:

  • Identification Tags: Key chains made of metal can hold identification tags or labels for easy identification of keys, especially in settings where multiple keys are used.

Collectibles and Hobbies:

  • Collectible Items: Some individuals collect metal key chains as a hobby, seeking unique or rare designs to add to their collections.

Fundraising and Charity:

  • Fundraising Items: Non-profit organizations or charities often use metal key chains as fundraising items, selling them to raise funds for their causes.

Practical Applications:

  • Industrial Settings: In industrial or commercial settings, metal key chains may be used to secure or tag machinery keys or tools.

Metal key chains are versatile accessories that serve both practical and decorative purposes. Their durability, customizability, and wide range of designs make them popular in various personal, promotional, and organizational contexts.

Metal key chains

Gray contact lenses suitable for who to wear

Gray contact lenses can be suitable for a wide range of individuals, as they offer a versatile and natural-looking effect.

Here are some factors to consider when determining if gray contact lenses are suitable for you:

  1. Natural Eye Color: Gray contact lenses can work well for individuals with various natural eye colors, including brown, blue, green, or hazel. Gray lenses can enhance the existing eye color, creating a subtle and realistic effect.
  2. Skin Tone: Gray contact lenses can complement different skin tones. Whether you have warm, cool, or neutral undertones, there are shades of gray that can harmonize with your complexion. Lighter shades of gray may work well with fairer skin tones, while darker gray tones can provide a striking contrast for deeper skin tones.
  3. Desired Effect: Gray contact lenses can offer different effects depending on the specific shade and design. Light gray lenses can create a soft and natural look, while darker gray or charcoal lenses can provide a more intense and dramatic appearance. Consider the effect you want to achieve and choose the shade of gray accordingly.
  4. Versatility: Gray contact lenses are versatile and can be suitable for various occasions and styles. They can be worn for everyday use to enhance your natural beauty or for special events, fashion purposes, or artistic performances. Gray lenses can offer a subtle and sophisticated look that complements different outfits and makeup styles.
  5. Personal Preference: Ultimately, the suitability of gray contact lenses depends on your personal preference and the look you desire. If you are drawn to the elegance and subtlety of gray eyes or if you want to experiment with a different eye color while maintaining a natural appearance, gray contact lenses can be a good choice.

It’s important to consult with an eye care professional to ensure a proper fit and to receive personalized recommendations based on your eye health, prescription needs, gray colored contact lenses and desired effect. They can help you choose the most suitable shade of gray and provide guidance on proper usage and care of the contact lenses.

Here’s some more information when it comes to gray contact lenses:

  • Natural yet special: Grey contact lenses give a natural look while still having a certain special effect. Gray is a neutral tone that adds depth and subtle variation to your eyes without being overly prominent or exaggerated. This balance makes grey contact lenses suitable for people seeking a delicate and easygoing look.
  • Suitable for different occasions: Grey contact lenses are suitable for various occasions. Whether for everyday wear or special occasions, grey contact lenses can provide a modern and stylish look. They can be adapted to a variety of makeup and clothing styles, and add a touch of mystery and sophistication to an overall look.
  • Match with various eye colors: Gray contact lenses are suitable for a variety of eye colors. Whether your natural eye color is brown, blue, green, or a mix of colors, gray contact lenses can enhance the visual effects of your eyes, making them look brighter and more appealing.
  • Coordination with skin tone: Gray contact lenses can be coordinated with a variety of skin tones. Gray is a neutral tone that suits a variety of skin tone types, including lighter skin tones and darker skin tones. The exact type of grey you choose can be determined based on your skin tone and personal preference.
  • Makeup and outfit matching: Grey contact lenses can be paired with different makeup and outfits to add subtle variations to the overall look. You can choose makeup, eyeshadow, and costume colors that match the gray glasses to achieve a coordinated and unified look.
  • Personal style and preference: The appropriateness of choosing grey contact lenses also depends on your personal style and preferences. If you prefer a neutral and muted look, or want to try a look that is slightly different from your natural eye color, gray contact lenses may be a good choice.

Keep in mind that to ensure the comfort and safety of wearing contact lenses, it is recommended to consult an eye professional. They can provide personalized advice and guidance based on your eye health, prescription needs, and personal preferences.

gray colored contact lenses